【更新】2分钟,让colab给我画画
根据 Colab 的特性更新了脚本,启动时间缩短到 2 分钟左右。
# 核心部分
!wget -q -c 'https://github.com/cloudflare/cloudflared/releases/latest/download/cloudflared-linux-amd64' -O cfd
!chmod a+x cfd

!pip install --prefer-binary udocker
!udocker --allow-root pull ubuntu:latest
!udocker --allow-root create --name=ubuntu ubuntu:latest
!udocker --allow-root setup --nvidia ubuntu

!pip install --prefer-binary -r https://raw.githubusercontent.com/comfyanonymous/ComfyUI/master/requirements.txt
!pip install --prefer-binary -r https://raw.githubusercontent.com/ltdrdata/ComfyUI-Manager/main/requirements.txt

!udocker --allow-root run -v /usr --entrypoint=sh ubuntu -c "git config --global http.sslVerify false"
!udocker --allow-root run -v /usr --entrypoint=sh ubuntu -c "git clone https://github.com/comfyanonymous/Comfy\UI"
!udocker --allow-root run -v /usr --entrypoint=sh ubuntu -c "cd ComfyUI/custom_nodes; git clone https://github.com/ltdrdata/ComfyUI-Manager"
# 启动部分
!nohup ./cfd tunnel --url http://localhost:88 2>cf.log 1>/dev/null &
while True:
  with open('cf.log', 'r') as f:
    for l in f:
      if ".trycloudflare.com" in l:
        print('WebUI URL: ',l[l.find("http"):-2].strip())
        break
    else:
      import time; time.sleep(0.5)
      continue
    break

!udocker --allow-root run -p 88:8188 --hostenv -v /usr -v /etc --entrypoint=sh ubuntu -c 'cd ~/ComfyUI; python main.py --preview-method auto'
# CPU 运行在 python main.py 启动参数里加上 --cpu
如何做到的?
旧版使用的是 ComfyUI-Manager 里的安装脚本,它默认创建一个隔离的 python 环境,这需要重新安装所有依赖。
由于 Colab 本身已经安装了大部分库,我们可以直接利用起来。Colab 还对 Cuda 相关包做了缓存,所以不指定版本可以省去不少下载时间,同时也节省了空间。现在,udocker 只负责隐匿程序目录,环境均在宿主处理。
此外,还稍微完善了一下 WebUI 入口展示方式,不再需要手动打开文件查看了。
以下是旧的通用脚本
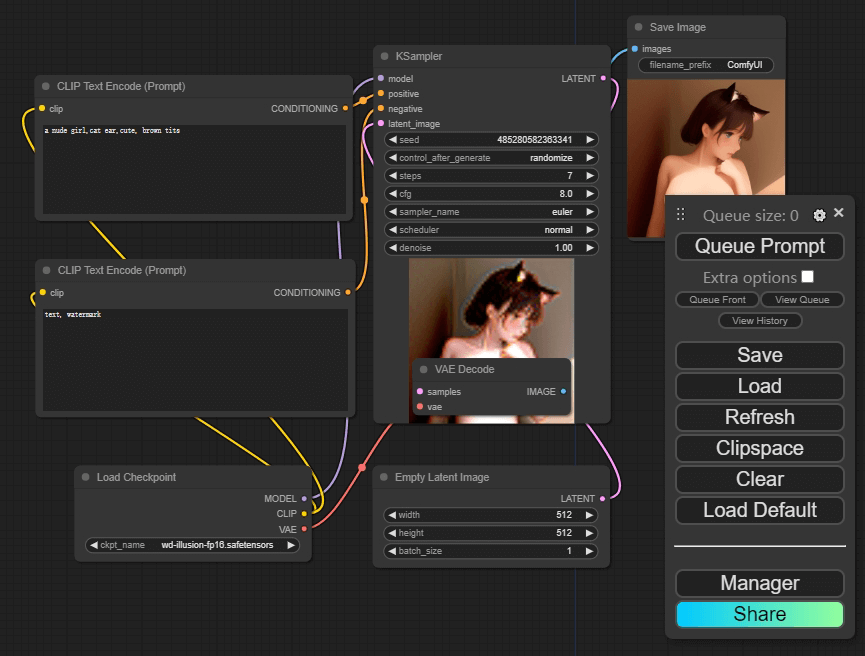
之前写了个 Stable Diffusion 版本的,这次是 ComfyUI 版本。
以下是 CPU 版本,GPU 只要把注释的两行打开即可。
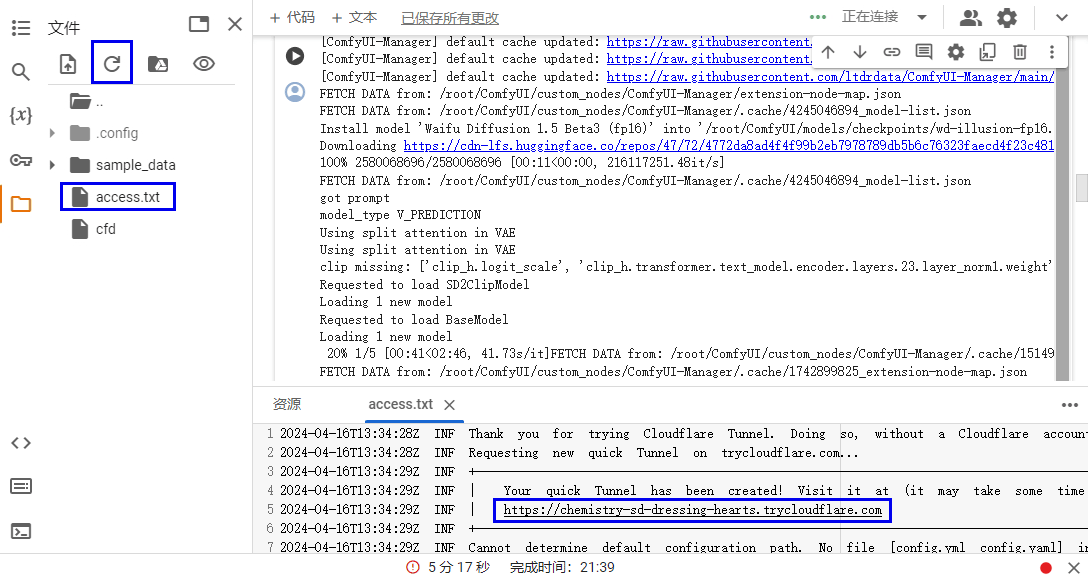
启动大约需要 7 分钟,空框架不含模型。web 入口在 access.txt 中,可以通过侧边管理查看。
!wget -q -c 'https://github.com/cloudflare/cloudflared/releases/latest/download/cloudflared-linux-amd64' -O cfd
!chmod a+x cfd

!pip install udocker
!udocker --allow-root pull ubuntu:latest
!udocker --allow-root create --name=ubuntu ubuntu:latest
# !udocker --allow-root setup --nvidia ubuntu
!udocker --allow-root run --entrypoint=sh ubuntu -c 'apt update; apt install -y git python-is-python3 python3.10-venv python3-pip wget'
!udocker --allow-root run --entrypoint=sh ubuntu -c 'wget -O - https://raw.githubusercontent.com/ltdrdata/ComfyUI-Manager/main/scripts/install-comfyui-venv-linux.sh | bash'
!udocker --allow-root run --entrypoint=sh ubuntu -c 'pip cache purge'

!nohup ./cfd tunnel --url http://localhost:8433 > access.txt &
# !udocker --allow-root run -p 8433:8188 --entrypoint=sh ubuntu -c './run_gpu.sh'
!udocker --allow-root run -p 8433:8188 --entrypoint=sh ubuntu -c './run_cpu.sh'
这里面有不少的坑,有一些还莫名其妙,这里稍微记录一下。
- 尽量不用别人现成 docker image,因为结构可能奇奇怪怪。如果深入到容器内修改文件,可能连基本命令都找不到。之前就遇到过用 ChromiumOS 做容器的,wget 难以安装(最后利用 python wget module 替代)。
- Colab 对画画的检测还是挺多的,直接安装必然会被掐。如果通过 apt 安装 cloudflared 并通过 thread 调用也会被掐,不知道是哪个环节影响的。
- cloudflared 使用自定义域名会导致 ComfyUI-Manager 有几个 js 502 错误无法加载,使用快速随机域名 tunnel 就不会。查了下可能和 tls verify 设置有关,但现在 Cloudflare 后台砍掉了这个设置,暂时不知道去哪改。